
Hi all! School is in session! I'm guest posting this tutorial today on Michelle's blog, i like orange too, as well as my own! Michelle and I agree that sewing basics, tips and tricks should really be free. If it doesn't involve a pattern, you shouldn't have to pay for it! I'm here today to teach you about zippered pockets!
Alrighty kids! It's time to put on your big girl panties and break out your zipper foot again! I'm going to give a (fairly) quick tutorial on how to install a large zippered pocket into almost ANY bag pattern without cutting a hole in the lining! I say almost because I have run across one pattern, Anna Maria Horner's Multitasker Tote, where my method won't work. The reason it won't work on this pattern is because the lining meets in the middle on that pattern, not the sides. Once you see my method, you'll understand why it wouldn't work.
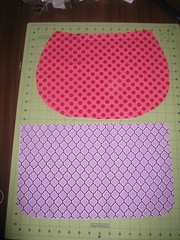
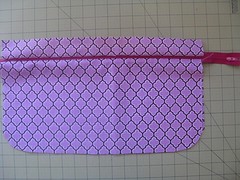
It doesn't matter what size or shape your lining is.
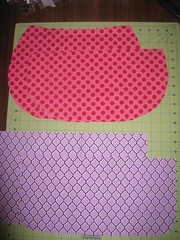
You will need to cut TWO additional pieces of fabric the same shape as your lining, only subtract 2-4" from the top. This is not an exact science. It will depend on how high up you want your pocket, the style of the bag, or just what you're in the mood to cut that day. You want to be sure that you are low enough down that your zipper won't be close to the edge of your lining when you have to sew it to your exterior--so check the seam allowances for your particular pattern. I think mine are about 3" down.
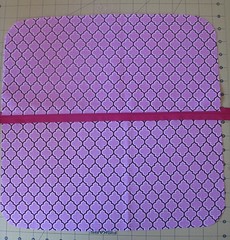
See? I have one piece of lining and two pieces, cut short, that will become our lined pocket.
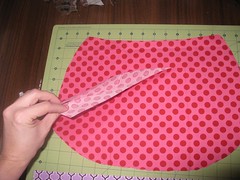
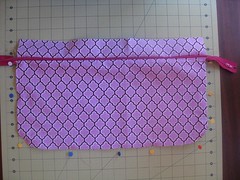
Ok, I'm sorry for the lining switch, but I think this one shows up a bit better. Get a zipper LONGER than the width of your lining/pocket pieces.

Place one short pocket piece right side UP. Place your zipper on top, right side DOWN. Next place your second pocket piece right side DOWN on top of the zipper.
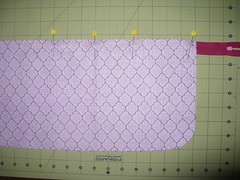
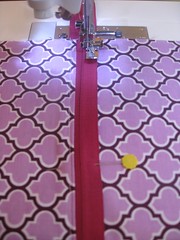
Line up the top edges of all three layers and pin in place.
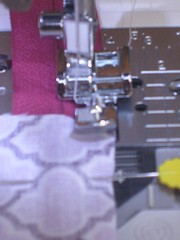
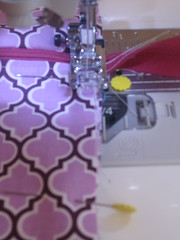
Using your zipper foot, sew about a 1/4" from the edge of the fabric. I would recommend leaving the pins in so your layers don't shift. Since you're using a zipper that is LONGER than the width of your lining, attaching it to the pocket fabric should be no problem because the zipper pull doesn't even have to come close to your machine. :)
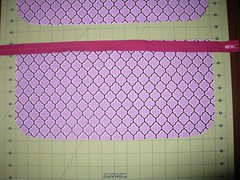
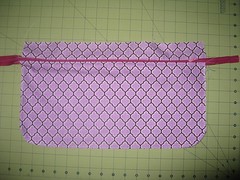
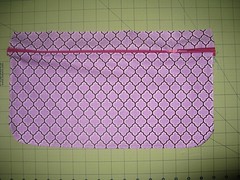
This is what you should have now. Press the fabric away from the zipper on both sides!

Because we want the pocket to look pretty on the outside and the lining to stay out of the zipper, we're going to top stitch about 1/8" from the edge of the fabric. I use the left end of my zipper foot as a guide. It's about 1/8" away from my needle. You can eyeball it. The main point is to keep the pocket lining from getting caught in the zipper and to improve the appearance of your pocket.
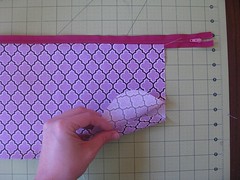
Lay your zipper, right side up, on top of the lining piece you will be attaching it to. Line up the bottom edges. I've folded the pocket here so you can see how all the layers look.
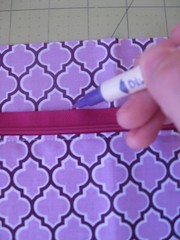
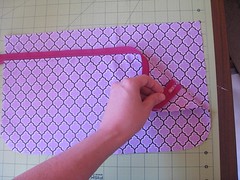
Using chalk, pencil, disappearing ink or whatever kind of marking tool you can remove later, mark along the top edge of the zipper. I made several dots along the length of the zipper since they are easier to remove than a solid line.
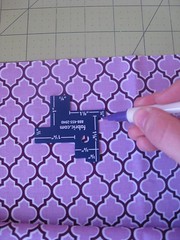
Now move your pocket out of the way and mark a line or dotted line 1/4" BELOW the line you just drew.
Flip the pocket upside down--so you can't see the zipper pull or the top of the lining piece. Align the edge of the zipper with the second line you drew. Got that? The second line--the one on the bottom, the lower one. The reason you drew the first one was to ensure the second line was straight across the lining piece. Because lining shapes can vary and are often curved, you can't always accurately use a ruler to determine what is straight across the lining piece--especially with larger bags. Trust me, this has happened to me and I've attached the zipper to the lining only to realize later that I sewed it at an angle. The first line we know is straight because the bottom edges of the bag and pocket pieces are matched and the edge of the zipper is straight.

Pin the upside down pocket/zipper to the lining piece, making sure the edge of the zipper is even with the second line.
Using 1/4" seam, sew the pocket to the lining. Leave those pins in ladies! It really helps project from shifting!
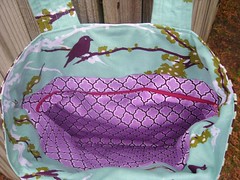
Whoo hoo! we have a zippered pocket attached to our lining! We're almost done! Press this bad boy down a bit (I haven't done that yet in this picture)

These are what your layers should look like.
Line up the edges of the pocket and lining and pin in place. If, for whatever reason, things aren't lining up, you may have to do one of two things:
1. If, when your lining piece is laying flat, the edges of the pocket pieces extend over the lining piece, simply trim the pocket pieces to match the bottom of the lining piece
2. If, when your lining piece is laying flat, the pocket pieces don't reach the bottom edges of the lining piece by more than 1/4", you may have redo the last step and move your entire zipper down a bit.
When I made this, my pocket piece was a hair shy from reaching the bottom of the lining, but with my bag seam allowances of 1/2", I knew everything would be caught up there so I did not move my zipper.
Once you have everything lined up on the bottom and pinned, use your longest stitch length to baste the pocket to the lining along the bottom and sides. DO NOT SEW OVER THE ZIPPER!!!!!! Just sew around the fabric part of the pocket. The basting step is important because you will likely have to leave a hole in your lining for turning and it would be a hot mess if you had all those pocket layer flowing free at that point.
Pull your zipper open enough so that the zipper pull is in the lining/pocket area--not over to the side all lonely like it has been through this entire process.
Trim any part of the zipper hanging beyond the lining. You do not have to sew zipper stops even if you cut them both off since the edges of the zipper will be closed when you sew the lining in the bag. Cool, huh? Now just follow the pattern instructions for your bag and treat this lining piece as if nothing has happened.
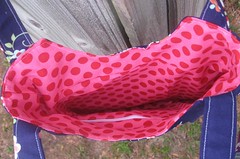
Now I have a huge zippered pocket in my bag and I didn't have to cut a hole in my lining to get it! I've used this method on at least 5 different bag patterns and it works everytime! P.S. These two bags are available in my etsy store! Happy sewing
3 comments:
this is awesome Kelly! I need to figure out how to do it. :) ♥ it.
What a freaking awesome tutorial. Thanks for sharing it!
Great tutorial, I will definitley try it out on the bag I am making. Also I didn't know you could do that to zips, that has really helped me with some dresses I want turn in to skirts - thanks!
Post a Comment