Showing posts with label quilt. Show all posts

Monday, September 14, 2015

Triangle Imprint: 30 Days of Sewing with AGF


For those of you new to my blog, welcome!  My name is Kelly and I am half of the pattern design team at Hearts and Bees and I'm an avid Instagram user named "kelbysews"!  Ever heard of the One Hour Basket?  That's me! :)  When Art Gallery contacted me about making something with one of their new lines for 30 Days of Sewing with AGF, I immediately jumped at the chance to play with Imprint by Katarina Roccella!  I love love love these colors! They are feminine without being overly girly!  I was also impressed with how well these fabrics work in quilting, home-dec, and apparel sewing!  Super versatile!  Plus, if you have never worked with Art Gallery fabrics before, you simply MUST try them! They are amazingly soft and have a fantastic hand!

I wanted to find a pattern that would showcase the fabrics and play into their modern, fresh feel.  I thought this Sugar Loaf block by Wooden Spoon Quilts was a happy match!  The block is FREE on Craftsy!  I chose to alternate the triangle Sugar Loaf blocks with simple squares so you see hints of the designs in the triangles, but get full design in the squares.  

The only change I made to the Sugar Loaf pattern was to enlarge it to 6.5" unfinished (6" finished).  I simply did this during the printing process by increasing the scale.  I adore how it turned out!  The finished quilt is 42"x48" perfect as a small lap quilt or for your favorite toddler's bed!  Thanks for stopping by!!!  

This blog post was sponsored by Art Gallery Fabrics


Saturday, March 7, 2015

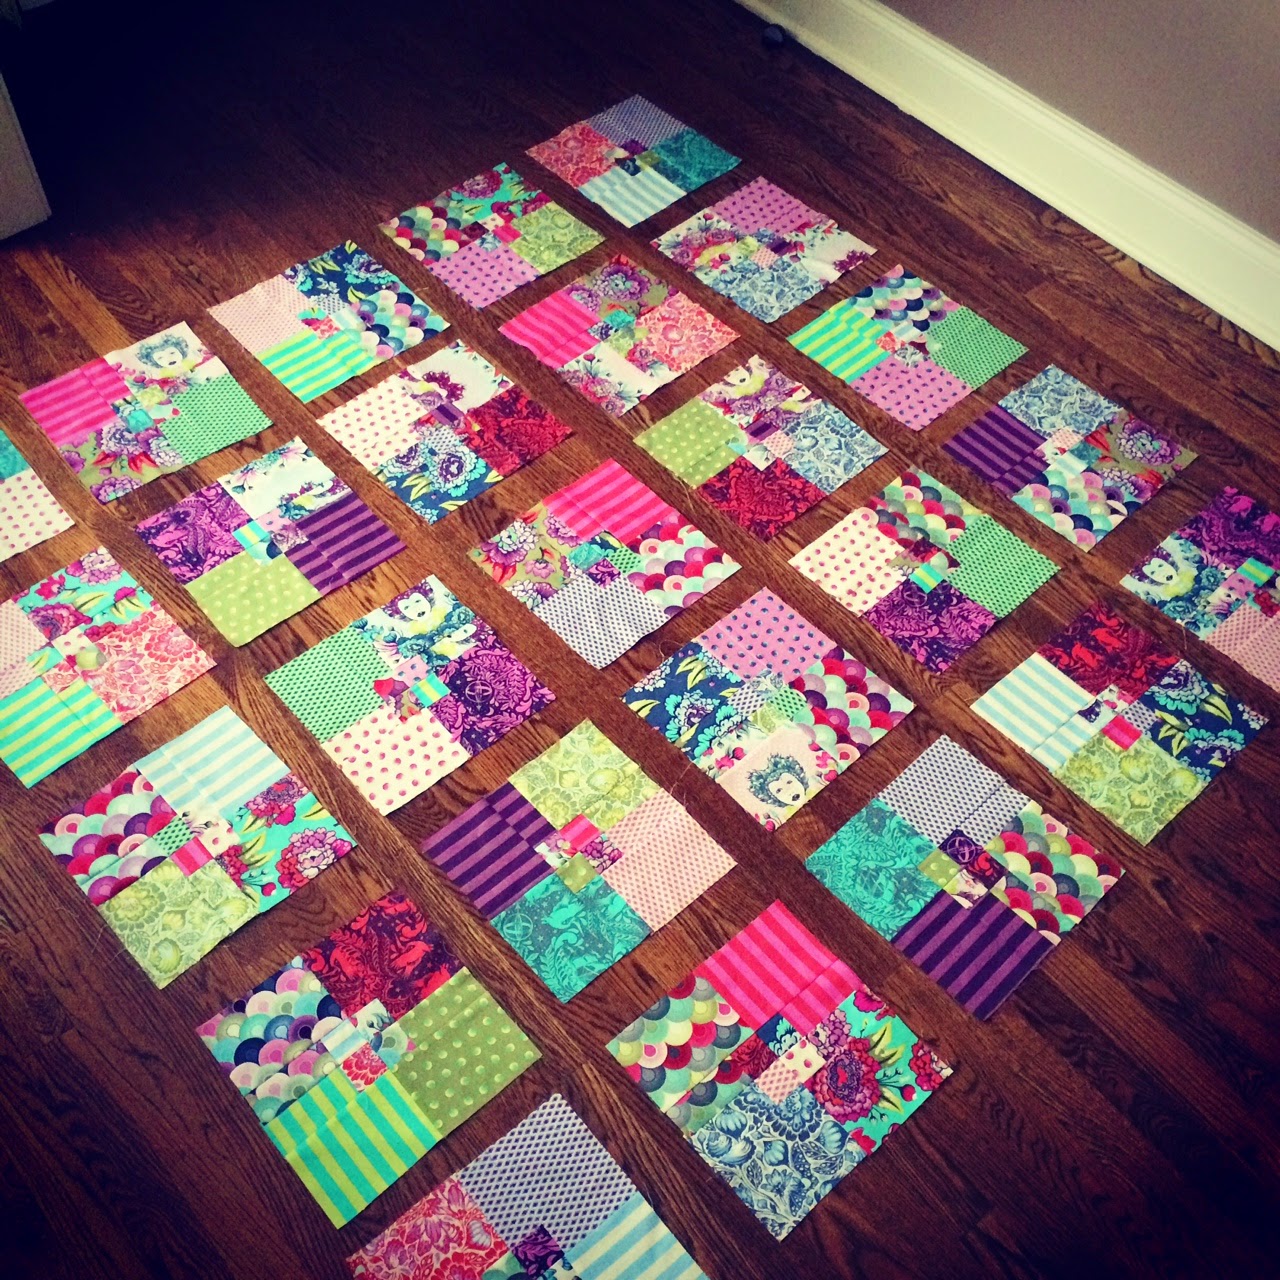
Simple Stained Glass Tutorial


I recently ordered a 4" design roll of Tula Pink's latest line, Elizabeth, from Hawthorne Threads.  I ordered yardage too, but I knew I would want to make something right away so I splurged and got the roll.  I made this super quick and easy pattern I thought I'd share!

Fabric Requirements:

(25) 4"xWOF strips of prints
2 yards background fabric
3.75 yards for backing
1/2 yard for binding


Cutting instructions:

From each print
(3) 4" squares
(2) 4"x11" rectangles

From the background fabric:
10.5"xWOF strip then sub cut into (20) 2"x10.5" rectangles for inner sashing
(8) 2"xWOF strips for inner sashing
(8) 4" xWOF strips for outside border


Mix and match your prints to create these square-in-square blocks.  Each block requires (1) 4" square of print A for the center and (2) 4" squares and (2) 4"x11" rectangles of print B for the outside square.  Once these are assembled, cut each 11" square-in-square block into 4 new squares.  


Mix and match again to create all new 10.5" blocks


It helps to lay it all our to make sure you don't have too many of the same print clustered together.  


Add your sashing strips and voila!  Quilt finished at about 63" square.  


Tuesday, April 15, 2014

Easiest Chevron Quilt EVER {a Tutorial}


I love love love chevron quilts, but I really really really hate trimming half-square triangles and I never mastered the whole rectangle method.  When I figured out I could make a chevron with squares and not have to constantly worry about block orientation, I was stoked!!!  I'm not reinventing the wheel here folks.  I'm sure some smarty pants out there figured this method out ages ago and has a tutorial on it, but  I have never seen it so I'm guessing a few of you haven't either!  I'm also cutting out a lot of work and listing the fabric requirements and dimensions to make 4 different sizes so you don't have to do any math, yay!   That being said, I've only actually made two of the sizes below.  I sketched and did some rough cutting diagrams to make sure I had the right fabric requirements for the others.  If you find a mistake in the larger sizes, please let me know!  You can alter my math to fit whatever size squares you want to use, these are just what I chose.  There is no right or wrong!  Make it your own!  I'd love to see what you make so if you post on IG, Twitter, etc., tag me @kelbysews

For a 20" pillow/mini quilt you will need 5 Fat Quarters
from EACH fat quarter cut:
(5) 4.5" squares
(10) 2.5" squares

For a baby quilt 32"x40" you will need 1/2 yds of 5 fabrics
from EACH 1/2 yd cut:
(4) 8.5" squares
(8) 4.5" squares

For a lap quilt 60"X72" you will need 20" or 2/3 yd of 12 fabrics
from EACH 2/3 yd cut:
(10) 6.5" squares
(20) 3.5" squares

For a bed quilt 80"x90" you will need 1.25 yards of 9 fabrics
from EACH 1.25 yd cut:
(8) 10.5" squares
(16) 5.5" squares

For a bed quilt 84"x96" you will need 3/4 yd of 16 fabrics
from EACH 3/4 yd cut:
(14) 6.5" squares
(28) 3.5" squares

Rule of thumb:  The more fabrics you have, the more lines of zig-zags you have.  The larger the squares, the chunkier the chevron.  

I've cut and lined up my big and little squares to make the 20" chevron mini.  Be sure you're happy with the order you place the big squares.  You want to make sure there is some contrast between any two fabrics that are next to each other so you can see the chevron shape.  


Next, shift all the little squares UP one place so they can make friends with their new big square.  This means that the little squares that match your top fabric will move DOWN to the bottom fabric--in this picture, the smaller squares of yellow flowers on white move down to pair with the larger squares of white flowers on yellow.  


See?  All the little squares have new big square partners.  Keeping the original order of big squares is important in this quilt.  You can NOT make changes once the little squares start getting sewn so make sure you are happy with your order!


Using a ruler and your favorite marking tool, draw a diagonal line through ALL of the smaller squares on the back/wrong side.


Place the smaller square on the BOTTOM corner of the larger square you paired it with in the previous step--right sides together.  Here it is important to point out, if you have a directional print on your LARGER square like the white flowers on yellow, make sure you are placing the smaller square at the BOTTOM of the print.  As for the smaller squares, I decided I didn't care about direction for those.  It gets too stressful worrying about it and I like quilts that are quick and easy.  It's easy to notice if the big square is oriented correctly, not so much for the smaller ones.  Additionally, you could avoid this whole paragraph if you used non-directional prints.  Just saying.  If you're ever in a hurry and want to make this quilt, non-directional is the way to go!


Sew along the line drawn, or, in my case, I sew VERY SLIGHTLY below the line (toward the part that will be cut off.  I do this because sometimes if you sew directly on the line, when you fold the little square down, it's a bit short of making your larger square whole again.  This is due to the fold line created when you fold the smaller square down.  If you sew a hairline below where the line is, your squares come out perfect!


Using a rotary cutter or scissors, trim off the bottom corner leaving 1/4" seam allowance below the stitch line.  Don't throw these little triangle paris away!  They are already perfectly matched and ready to make into half-square triangles on a another day!  You can make mug rugs, potholders, table runners, or even whole quilts from these trimmings depending on how large of a project you're making.  


Press the seam open.  It's actually important for bulk reasons, so trust me, OPEN.  I know some of you are old school, but take a walk on the wild side and try my way here!


Repeat the sew and trim process for the second square.  


OPEN OPEN OPEN! 


Your finished block.  It should still be the size of your larger block, but with cute little contrasting triangles on the bottom.


Once you finish all the blocks for the row, sew them together.  Repeat for the remaining rows.  I alternate which side I press the seams per row because pressing open at this stage isn't important and it's faster to nest the seams than match seams that are pressed open.  Once you make all your rows, simply join them together to form your chevron! Is that easy or what????????  If you have any assembly questions please feel free to ask! 

My finished 20" block


This was my original project with this method.  This is a 32"x40" baby quilt made with Alison Glass and Tula Pink fabrics.  It's super bright and fun!


I went with high contrast for the back and used my favorite IKEA numbers print.  Why they discontinued this print is a mystery! 


Tuesday, December 17, 2013

Sweat Shop

I've been hard at work lately between gifts and finishing up custom orders!  One of my favorite go-to gifts are these voile/velveteen infinity scarves!  Anna Maria Horner has a great tutorial on her blog, though I use different measurements since I find hers a bit bulky.  For mine, I use one yard of voile and one yard of velveteen to get TWO scarves.  I cut two pieces of velveteen 13"x36" then sew together along the 13" end to get a 13"x72"ish piece.  Repeat with the voile.  Then follow Anna Maria Horner's instructions!  Well, I also sort of cheat and machine stitch everything closed with invisible thread.  Shhhhhh!  Don't tell anyone I'm too lazy to hand stitch!

Dobby voile and leopard velveteen scarf done!

Purple velveteen/voile scarf done!

Last one for the night!

Infinity scarves + totes on clearance at Old Navy= teacher gifts done!!!
Then I put all the scarves in some totes I got on clearance at Old Navy.  Voila!  Teacher gifts!

Quilted, bound, washed, dried, and ready to go to it's new home! Experimented with three separate quilting styles on this. Sadly, the tension wasn't great on one method. Hopefully the person who receives it won't care! #nobodyisperfect
I also finished this quilt, which has been partially quilted for months, and gave it to my friend, Ryan, because he's cool and I just felt like giving it away.  :)

Finally framed the mini Dresden @insidethepaperbox made me! I painted the matting of a frame on clearance at Pottery Barn.
Jessie made me this mini dresden forever ago and I finally found the perfect frame for it……after I painted the matting that awesome color!  Can't wait to hang this up!

3 boxy bags done! Birds are a gift, deer is for @rachelgriffith and middle text one is for sale.
A few more boxy bags for gifts!

@libertylondon trees done!!!! @crazymomquilts pattern is my favorite!
Some Liberty Christmas trees as gifts for special ladies!


Saturday, November 30, 2013

The Crossing: An Easy Quilt Tutorial

Made on my BabyLock Symphony

I've been wanting to use my Chicopee fabric for a while, but I couldn't decide on a pattern.  I saw something similar (almost exactly) to this quilt on Pintrest by HoosierToni and knew immediately I wanted to make it!  It had the added benefit of being easy! :)  This quilt is a 5x6 layout and is 67.5"x81" finished.

Each cross requires roughly a fat eighth (9"x21") of fabric.  If you have fat quarters, you can make 2 crosses per fat quarter.  For this quilt, I made 30 crosses so you will need 30 FEs or 15 FQs plus 1.75 yards of solid.  I'd get 2 yards of solid to be safe!  

Cutting for EACH print if using 30 FEs:
Cut one strip 5"x21" then sub cut into (4) 5" squares
Cut one strip 2.75"x21" then sub cut into (4) 2.75"x5" rectangles

OR

Cutting for EACH print if using 15 FQs:
Cut 2 strips 5"x21" then sub cut into (8) 5" squares
Cut 2 strips 2.75"x21" then sub cut into (8) 2.75"x5" rectangles

Cutting for Solid:
Cut (4) 5" x WOF strips then sub cut into (30) 5" squares
Cut (8) 5" x WOF strips then sub cut into 120 2.75"x5" rectangles

For each block you will need 4 print squares, 1 solid square, 4 print rectangles, and 4 solid rectangles.

Sew each print rectangle to a solid rectangle along the 5" side.  Press seams open.

Create each block as shown below.  Block is 14" unfinished. 


Enjoy!  Happy sewing!


Monday, October 28, 2013

Starry-Eyed Quilt: Blogger's Quilt Festival

Every year Amy hosts this great event called the Blogger's Quilt Festival.  If you haven't heard of it, you REALLY need to check it out!  Soooooooooo many inspirational quilts and new bloggers to discover!  This year I'm entering two quilts, one is my "Starry-Eyed Quilt" in the Throw Quilt category (here's the other one):


I recently blogged about this one and the method I used to make it.  Every print is from designer Anna Maria Horner.  Some new, some old, some VERY old.  Everyone loved and precious to me!

I got it all quilted up and ready to ship to its new home---and, yes, that means I'm not keeping it!  It's a shocker I know, but I do have, uh, several other Anna Maria Horner quilts to keep me warm! 


I used my favorite Innocent Crush print for the backing on this one and I couldn't be happier with the results, even though it was a case of using what I had on hand!  It's ones of the BEST feelings to find enough yardage for backing in my stash!

Before it was quilted this quilt made a nice curtain in my living room!  My husband thought it was a bit too much to stay there permanently.  Oh well! 

Look how pretty it looked with the light coming through!  

Hope you all enjoy the Festival and blog hopping!  Psssst!  Vote for me! :)


Best Bee Quilt Ever: Blogger's Quilt Festival

Every year Amy hosts this great event called the Blogger's Quilt Festival.  If you haven't heard of it, you REALLY need to check it out!  Soooooooooo many inspirational quilts and new bloggers to discover!  This year I'm entering two quilts, one is my "Best Bee Quilt Ever" in the Group/Bee Category (here's the other one):

Bee quilt complete
I pretty much think this is the best quilt ever made, but I may be bias!  :)  This quilt is the culmination of two bees, The VIBs and the Twice Around the Block groups.  The ladies were each give a piece of every print of Anna Maria Horner's Good Folks and asked to make a block constructed of half-square triangles.  The results blew me away!

Best.Bee.Quilt.Ever.
This is a little pre-quilting shot.

"K" monogram
I had it professionally custom quilted by Krista Withers and she totally killed it!  See that fabulous "K" she worked in there?  

front/back
I decided on another Anna Maria Horner print for the backing (from Field Study).

quilting

rainbow block

I adore this quilt and it certainly holds a special place in my heart (and on my couch!)  Hope you all enjoy the Festival and blog hopping!  Psssst!  Vote for me! :)


Sunday, October 13, 2013

Starry-Eyed Quilt and My Favorite Ruler


It's no secret that I REALLY love designer Anna Maria Horner's fabric.  What I love most is that when you look at some of the prints individually you may think, "meh".  However, when you put them all together, what should be a hot mess ends up being an explosion of colorful awesomeness......in my opinion at least!  I love to hoard my AMH, but sometimes I get really annoyed at myself for NOT using precious fabric.  I decided to go all out on this quilt!  I was using as much AMH as I could find in my stash--hard to find prints and all!  


I wanted to keep the pattern simple, but not as basic as square patchwork.  I decided on the Sawtooth Star mainly because I had a new ruler I wanted to try.  
This is my new favorite ruler!  The Flying Geese ruler!  Seriously, so freaking in love with this thing! It made putting this quilt together so easy, so fast, and with virtually perfect results.  I didn't have to trim one single block! I thought I'd give a brief overview on how this little guy works.  I got mine at JoAnn's and they carried two sizes, 3"x6" (what I have) and 4"x8".  Each ruler makes two sizes of geese.  Mine will make 1.5"x3" and 3"x6".  

Cut two squares according to the package direction for the size geese you want to make.  Place the squares rights sides together and center the smaller square on the larger one (I just folded creases in the squares to find the middle)  I ended up cutting my larger square .5" larger than they suggested because it gave me more wiggle room when I went to trim the blocks at the end.  

Draw a diagonal line through the smaller square and sew 1/4" on either side of the line, just like when you make HSTs.


Cut along the line you drew.

Open the resulting units and press toward the larger square.  Then place the squares right sides together matching the corners, NOT THE SEAMS IN THE MIDDLE.

The corners should be opposite fabrics.

Draw another diagonal line and sew 1/4" on either side, then cut on the line you drew.

This is the strangest step, but it's important! make a tiny snip in between the seams of each resulting unit.  Don't clip through the stitches holding it together! Then, you can press the seam allowance toward the larger square fabric on each side of the unit.  Trust me, this will make sense once you do it!

You end up with two weird looking blocks like this.  For reference, if you looked on the back of this block, my seam allowance would be clipped in the area where the tops of the red triangles meet.  All seam allowances are pressed to the red fabric.


Now it's time to break out the best ruler ever! This would also be a good time to bust out your rotating cutting mat if you have one.  Line up the ruler to the geese on your block and trim all the way around.

Ta-da! FOUR amazingly perfect geese!!!!  I know these seems like a bunch of steps, but the results are perfect and you get 4 units for your effort!  Seriously, I love this freaking ruler! For these blocks, I used (4) geese, (4) 3.5"squares, and (1) 6.5" square.  The block is 12.5" unfinished.

Made on my BabyLock Symphony
I love how wild and crazy this quilt turned out! It wasn't planned (a real challenge for me) and I didn't edit myself much in my fabric selection or pairing.  It's my stream-of-consciousness quilt!  Maybe I should rename it The Sound and the Fury quilt.  Jeez, I think my nerd is showing.  That high school term paper is still haunting me!  Hopefully some of you got that reference!


Related Posts Plugin for WordPress, Blogger...